- Published on
Using Next.js and Serverless Functions to Create a Proxy to Hide Sensitive Information (API keys)
- Authors
- Name
- Sam Mark
- @Twitter/smmk


Notice: I have made significant updates to the code to ensure compatibility with Next.js 13, please click here to see the new code.
Using Next.js and Serverless Functions to Create a Proxy to Hide Sensitive Information
In web development, it's common to interact with external APIs to fetch data or perform certain operations. However, this often requires using API keys or other sensitive information, which should not be exposed on the client-side. One way to handle this securely is by using a proxy server that hides the sensitive information and forwards the requests to the API.
In this article, we will explore how to use Next.js and serverless functions to create a proxy server that hides sensitive information such as API keys. We'll walk through the code examples and explain each step along the way.
You can find the complete source code of this project, along with more exciting projects, on copperramparts.com/projects. Copper Ramparts is a platform that showcases various web development projects and provides access to their source code. By visiting the website, you can explore this project in detail, examine its source code, and even gain inspiration for your own projects. Whether you're a beginner or an experienced developer, Copper Ramparts offers a valuable resource for learning, discovering new ideas, and enhancing your web development skills. So, don't hesitate to check out the platform and delve into the fascinating world of web development projects.
What is Next.js?
Next.js is a popular React framework that provides server-side rendering (SSR), static site generation (SSG), and other features to simplify React development. It offers an intuitive and powerful API that allows developers to build robust web applications.
What are Serverless Functions?
Serverless functions, also known as serverless APIs or serverless endpoints, are functions that run in a serverless computing environment. They allow developers to write and deploy code without managing the underlying infrastructure. Serverless functions are often used in Next.js applications to handle server-side logic.
Creating the Proxy Server
To create a proxy server in Next.js, we can use a serverless function. Serverless functions in Next.js are stored in the pages/api directory and automatically deployed as serverless endpoints.
In Next.js, the pages directory serves as the entry point for your application's routes. It contains files that represent different pages or routes in your application. The api directory within the pages directory is specifically reserved for serverless functions.
When you create a file in the pages/api directory, it becomes a serverless function accessible at a specific URL endpoint. For example, if you create a file named my-proxy.js in the pages/api directory, it can be accessed at https://your-domain.com/api/my-proxy. Next.js handles the deployment and routing of these serverless functions automatically.
Inside the serverless function file, you can define the logic for proxying requests to other APIs or services. For example, you can use libraries like axios or built-in Node.js modules like http or https to make HTTP requests to external APIs and return the responses.
Remember to follow the recommended practices for organizing your serverless functions and keeping them modular and maintainable. You can create multiple files in the pages/api directory to separate different proxy functionalities or group related endpoints together.
By leveraging the pages/api directory in Next.js, you can easily create and deploy serverless proxy endpoints to handle specific API requests within your application.
Let's take a look at the code for the serverless function that acts as our proxy server:
import { NextApiRequest, NextApiResponse } from 'next';
import axios from 'axios';

const API_KEY = process.env.RAPIDAPI_KEY;

export default async function handler(req: NextApiRequest, res: NextApiResponse) {
  const { url, method = 'GET', params = {}, headers = {} } = req.body;
  try {
    const response = await axios.request({
      url,
      method,
      params,
      headers: {
         'X-RapidAPI-Key': API_KEY,
         ...headers
      },
    });
    res.status(response.status).json(response.data);
  } catch (error:any) {
    res.status(error.response?.status || 500).json({ message: error.message });
  }
}
In this code, we import the necessary modules: NextApiRequest and NextApiResponse from Next.js, and axios for making HTTP requests. We also define the API_KEY constant, which represents our sensitive information (in this case, an API key) stored in an environment variable.
The handler function is the main entry point for our serverless function. It receives a request (req) and a response (res) object as parameters. Inside the function, we destructure the url, method, params, and headers from the request body.
We then use axios to make a request to the specified url using the provided method, params, and headers. We include the API_KEY in the headers object, along with any additional headers passed in the request.
If the request is successful, we respond with the received data and the corresponding HTTP status code. Otherwise, we handle any errors and respond with an error message and an appropriate status code.
To use this proxy server in our application, we need to make a request to the serverless endpoint /api/proxy with the necessary parameters.
Only response data and response status is returned to client
Let's break down how res.status(response.status).json(response.data) works and why it only shows the client the response data and status code.
In the serverless function code provided earlier, we have the following line of code:
res.status(response.status).json(response.data)
This line is responsible for sending the response back to the client with the appropriate status code and data.
Here's a breakdown of what each part does:
res.status(response.status): This sets the HTTP status code of the response to the same status code received from the external API. Theresponse.statusis the status code returned by the external API request made usingaxios. By usingres.status(), we can ensure that the client receives the correct status code, indicating whether the request was successful or encountered an error..json(response.data): This converts theresponse.datainto JSON format and sends it as the response body to the client. Theresponse.datacontains the actual data returned by the external API request. By using.json(), we ensure that the client receives the data in a structured JSON format that can be easily processed and used within the client-side code.
By separating the response status code and response data, we can handle and display them separately on the client-side. This separation allows us to handle errors appropriately and present relevant information to the user without exposing any sensitive information, such as the API key, in the response.
In the client-side code provided in the blog article, we can see how the response data is used to display the Bitcoin exchange rates. The conditional rendering within the BitcoinPrices component checks if the data variable is available and then displays the relevant information to the user. This way, the user only sees the fetched data and not the underlying implementation details or any sensitive information that was used in the proxy server.
By carefully managing the response in this way, we ensure a secure and controlled flow of information between the serverless function, the client-side code, and the end-user.
Environmental Variables
When working with sensitive information like API keys, it's crucial to handle them securely. In our proxy server implementation, we use environmental variables to store sensitive information, such as the API key, on the server.
To set environmental variables on the server, you can use various methods depending on your hosting environment. Here's an example of how to set the RAPIDAPI_KEY environmental variable:
export RAPIDAPI_KEY="your-api-key"
In this example, we're setting the RAPIDAPI_KEY variable to your actual API key. The export command makes the variable available to the server and any processes running on it.
It's important to note that you should never hardcode sensitive information directly into your code. By using environmental variables, you can keep the sensitive information separate from your codebase, making it easier to manage and secure.
In our serverless function code, we access the API key using process.env.RAPIDAPI_KEY. This retrieves the value of the RAPIDAPI_KEY environmental variable within the serverless function. By referencing the API key through the environmental variable, we ensure that it remains secure and hidden from prying eyes.
Before deploying your application, make sure to set the environmental variables on your hosting server or platform accordingly. This way, your proxy server can access the API key without exposing it in the code or the response to the client.
By properly managing environmental variables, you can enhance the security of your application and protect sensitive information from unauthorized access.
Integrating the Proxy Server in a Next.js Component
Now that we have our proxy server implemented, let's see how we can integrate it into a Next.js component. In this example, we'll create a component called BitcoinPrices that fetches Bitcoin exchange rates using the
proxy server.
import React from 'react'
import axios from 'axios'
import { useState, useEffect } from 'react'
import Image from 'next/image'
export default function BitcoinPrices() {
const [data, setData] = useState < any > null
useEffect(() => {
if (!data) fetchData()
return () => {}
}, [])
const fetchData = async () => {
try {
const response = await axios.post('/api/proxy', {
url: 'https://alpha-vantage.p.rapidapi.com/query',
params: {
from_currency: 'BTC',
function: 'CURRENCY_EXCHANGE_RATE',
to_currency: 'USD',
},
headers: {
'X-RapidAPI-Host': 'alpha-vantage.p.rapidapi.com',
},
})
setData(response.data)
} catch (error) {
console.error('Error fetching data:', error)
}
}
return (
<>
<div className="min-w-20 m-10 rounded-lg bg-gray-100 p-6 shadow-md">
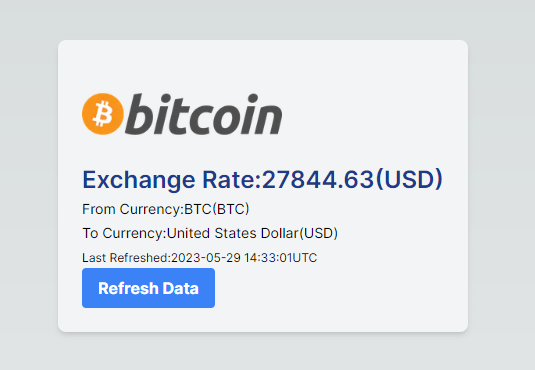
<Image src="/images/bitcoin.png" width="200" height="100" alt="bitcoin" />
{data ? (
<>
<p>
<span className="text-2xl font-semibold text-blue-900">
Exchange Rate:
{parseFloat(data['Realtime Currency Exchange Rate']['5. Exchange Rate']).toFixed(2)}
({data['Realtime Currency Exchange Rate']['3. To_Currency Code']})
</span>
</p>
<p>
<span className="text-sm">
From Currency:
{data['Realtime Currency Exchange Rate']['1. From_Currency Code']}({
data['Realtime Currency Exchange Rate']['1. From_Currency Code']
})
</span>
</p>
<p>
<span className="text-sm">
To Currency:
{data['Realtime Currency Exchange Rate']['4. To_Currency Name']}({
data['Realtime Currency Exchange Rate']['3. To_Currency Code']
})
</span>
</p>
<p>
<span className="text-xs">
Last Refreshed:
{data['Realtime Currency Exchange Rate']['6. Last Refreshed']}
{data['Realtime Currency Exchange Rate']['7. Time Zone']}
</span>
</p>
</>
) : (
<p>loading...</p>
)}
<button
className="rounded bg-blue-500 px-4 py-2 font-bold text-white hover:bg-blue-700"
onClick={fetchData}
>
Refresh Data
</button>
</div>
</>
)
}
In this component, we define the BitcoinPrices function component. Inside the component, we use the useState and useEffect hooks to manage the component's state and fetch the data when the component mounts.
The fetchData function makes a POST request to /api/proxy, passing the necessary parameters to retrieve the Bitcoin exchange rates. We provide the url, params, and headers needed by the proxy server to fetch the data from the Alpha Vantage API.
If the request is successful, we update the component's state with the received data. Otherwise, we log an error message to the console.
In the component's JSX, we display the Bitcoin logo using the Image component from Next.js. If the data is available, we display the exchange rate, currency details, and last refresh information. Otherwise, we display a "loading" message.
Finally, we render a button that triggers the fetchData function when clicked, allowing the user to refresh
Additionally, when working with APIs and proxy servers, it's important to have visibility into the details of the API calls being made. Web developer tools, such as the Network panel in Chrome, can be incredibly useful for this purpose. By opening the Network panel, developers can see detailed information about each API call, including the request and response headers, payload, and timing.
In the case of our proxy server implementation, the sensitive information, such as the API key, is obfuscated in the URL. This means that when inspecting the API call in the Network panel, the API key is not directly visible. Instead, it is passed as a header, specifically the 'X-RapidAPI-Key' header, which is added to the request headers within the serverless function.
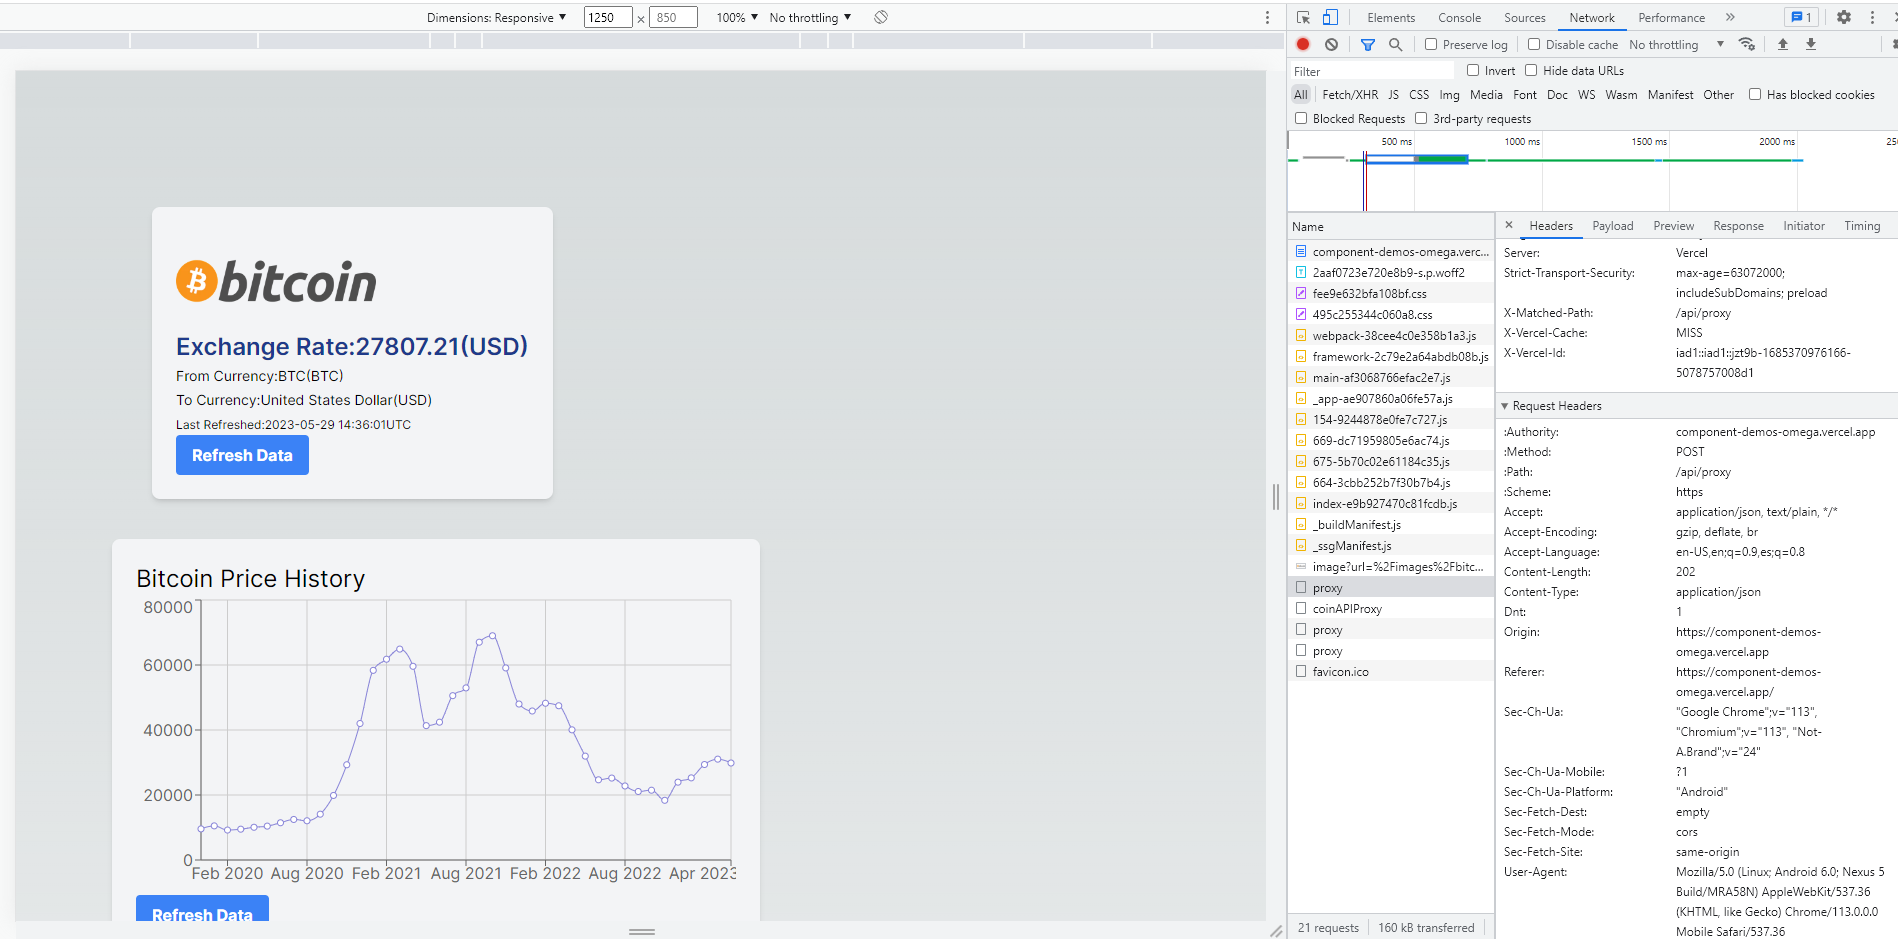
By obfuscating the sensitive information in this way, we ensure that it is not exposed in the URL itself, which could be visible to anyone inspecting the network traffic. This adds an extra layer of security to our application, protecting our sensitive information from unauthorized access.
Using web developer tools like the Network panel allows us to analyze and debug API calls effectively, ensuring that the data is being fetched and transmitted correctly. It's a valuable tool for web developers to have in their toolkit, particularly when working with APIs and proxy servers to hide sensitive information.
To see the source code for this project, you can visit the GitHub repository at github.com/smmk123/component-demos. The repository contains the code for various component demos, including the implementation of the proxy server using Next.js and the BitcoinPrices component. By exploring the source code, you can gain a deeper understanding of how Next.js and serverless functions are utilized to create a proxy server and how the BitcoinPrices component interacts with the proxy server to fetch Bitcoin exchange rates. Feel free to browse the repository, examine the code, and even contribute if you find areas for improvement or have ideas to enhance the project.